A strong pair of calves does more for you than just fill out your jeans. With properly performed weighted calf raises, you build power for running and jumping, improve ankle stability, and help protect your Achilles tendon. This guide walks you through how to do weighted calf raises correctly, how to progress them, and how to fit them into your workouts.
Why weighted calf raises matter
Your calves work hard every time you walk, climb stairs, or push off to sprint. Weighted calf raises add resistance to that natural movement so you can:
- Increase strength in the gastrocnemius and soleus muscles
- Improve ankle stability and balance
- Boost vertical jump and running performance
- Support injury prevention around the ankle and Achilles
According to experts at the Mayo Clinic, calf raise exercises with dumbbells help strengthen the muscles at the back of your lower legs and can protect your Achilles tendon from injury. If you already do bodyweight calf raises easily, adding load is the next logical step.
Key types of weighted calf raises
You can perform weighted calf raises in a few main ways. Each variation slightly shifts emphasis and changes how challenging the balance component feels.
Standing dumbbell calf raises
This is the most accessible option. You only need a pair of dumbbells and a stable surface.
You hold one or two dumbbells by your sides, then raise and lower your heels. This version challenges your balance a little more, since your hands are holding the weight instead of a support, but it is simple to set up at home or in any gym.
Standing belt or kettlebell calf raises
If you have a dip belt or a similar belt attachment, you can clip a kettlebell or weight plate to your waist. Your hands stay free so you can hold on to a rail or rig for balance. Athlete Movement notes that this belt setup is a preferred method for standing weighted calf raises because it allows you to add load while still using your hands for light support.
This approach works well when you want to go heavier without worrying about the dumbbells pulling your arms down first.
Standing barbell calf raises
Here, you set up as if you were doing a barbell squat, then raise and lower your heels. You can also stand on a block or step to increase the range of motion. According to Athlete Movement, the barbell version lets you load more weight, although you may want a block for extra extension and may need to modify your stance or use supports to help with balance.
Barbell calf raises can be very effective, but only make sense if you are already comfortable unracking and reracking a bar safely.
Seated dumbbell or machine calf raises
Seated calf raises mainly target the soleus muscle. You place a weight across your thighs with your feet on a step or platform and raise and lower your heels from a seated position. This option is especially useful if you have trouble balancing during standing versions or want to emphasize the deeper calf muscle.
How to perform dumbbell calf raises step by step
Weighted calf raises are simple on paper, but details matter. Proper form keeps the stress on your calf muscles instead of your joints.
The Mayo Clinic describes the basic dumbbell calf raise as follows:
- Stand upright holding a dumbbell in each hand. Your arms hang straight down by your sides, under your shoulders.
- Place your feet about shoulder width apart. You can stand flat on the floor or on the edge of a step so your heels can lower slightly below your toes.
- Keeping your back and knees straight, rise up onto the balls of your feet so your heels lift off the floor.
- Pause briefly at the top and feel your calves contract.
- Slowly lower your heels back down to the starting position.
That is one repetition. The emphasis here is on smooth and controlled movement. Mayo Clinic trainers recommend straight knees and steady tempo to get the best results.
Form tips you should focus on
To dial in your technique:
- Think of pushing the floor away with the balls of your feet
- Avoid bouncing, especially at the bottom of the movement
- Keep your knees softly locked, not bent and not hyperextended
- Lift as high as you comfortably can, then lower until you feel a gentle stretch in your calves
- If your balance feels shaky, lightly hold a chair, wall, or rail with one hand
Experts at Mayo Clinic also note that if balance is difficult, using a chair or pole for support is a smart modification. This does not reduce the effectiveness of the exercise and often lets you train the target muscles more safely and with better focus.
Sets, reps, and how often to train
You can tailor weighted calf raises to your specific goal by adjusting sets, reps, and load.
For general strength and basic conditioning, Mayo Clinic suggests that for most people one set of 12 to 15 repetitions is adequate for strengthening the calf muscles. As you progress, you can add more sets or slightly increase the weight.
For muscle growth and strength improvement, research and coaching experience support:
- Training your calves 2 to 3 times per week
- Using slow, controlled repetitions with full range of motion
- Choosing a weight that makes the last 3 to 4 reps of your set challenging but still clean
A common intermediate routine is 3 sets of about 12 to 15 reps with dumbbells, resting 60 to 90 seconds between sets. As you become stronger, you can move to heavier weights for sets of 8 to 10 reps, add a set, or introduce single leg variations.
Progressions and variations to keep improving
Your calves respond well to gradual, consistent overload. Instead of randomly changing exercises, build simple progressions.
From two legs to one
Single leg bodyweight calf raises already increase the challenge. Since only one leg is working, the effective load roughly doubles compared to doing them on both legs together. For a person weighing around 64 kilograms, this can significantly increase the intensity without extra equipment.
Consistent single leg calf raises, especially with full range of motion and higher repetitions, have been reported to improve both calf size and muscular endurance. They also play an important role in rehabilitation, particularly after lower leg injuries like Achilles ruptures, by helping restore a normal walking pattern and reducing limping.
You can move through these steps:
- Assisted two leg calf raises, using a support for balance
- Unassisted two leg weighted calf raises
- Assisted single leg calf raises, lightly holding a countertop or rail
- Unassisted single leg calf raises
- Single leg weighted calf raises as your balance and strength improve
Physical therapists often use a benchmark of about 20 smooth single leg calf raises as a sign that you are ready for more demanding activities like running and jumping.
Changing foot position
Where you point your toes slightly shifts which part of the calf works harder. In the dumbbell calf raise:
- Toes pointing straight ahead, balanced work across the calf
- Toes turned slightly inward, more emphasis on the outer head of the calf
- Toes turned slightly outward, more emphasis on the inner head
You do not need to exaggerate these angles. Even a small change can alter the feel. Rotate gently within a comfortable range instead of forcing your feet into an awkward position.
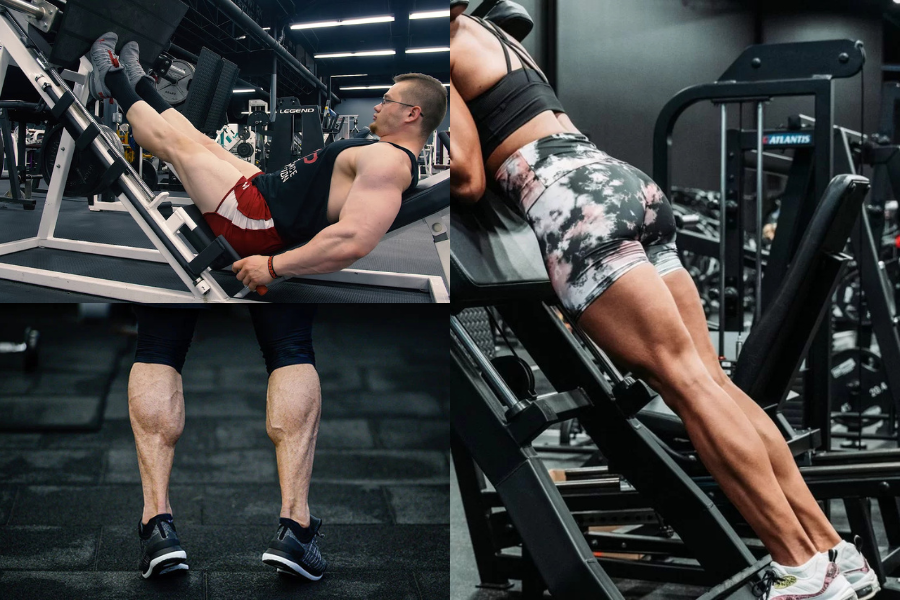
Extending the range of motion
Performing calf raises on a step or stair lets your heel drop below the level of your toes. This increases the stretch at the bottom and can boost muscle activation.
To do this safely, only lower as far as your ankle feels comfortable and focus on control, not on bouncing into the stretch. If your Achilles or ankles feel sensitive, reduce the depth and build up gradually.
How weighted calf raises fit into your training
You can plug weighted calf raises into a variety of workout styles without much disruption.
If you lift weights regularly, place them:
- Near the end of a lower body workout, after squats and deadlifts
- In a dedicated short calf and core block on days when you are short on time
- Superset with an upper body exercise, such as rows or presses, to keep the session efficient
If you mostly do cardio, add 2 to 3 short calf sessions per week. For example:
- After a run, complete 2 sets of 15 standing calf raises with bodyweight or light dumbbells
- On non running days, perform 3 sets of 10 to 12 heavier weighted calf raises
Because your calves work constantly when you move around, they recover fairly quickly. Still, it is a good idea to leave at least one day between hard calf sessions to avoid overuse.
A simple rule of thumb: if your calves are still very sore or tight from the last session, reduce the load or volume for the day and focus on smooth, easy reps.
Safety tips and when to be cautious
Weighted calf raises are relatively low risk, but there are still a few things you should watch for.
- Warm up with a few minutes of light activity, then a set of bodyweight calf raises before adding weight
- Avoid jerking or bouncing at the bottom, which can irritate the Achilles tendon
- Increase weight or volume gradually, especially if you are new to calf training
- If you feel sharp pain in the Achilles, heel, or ankle, stop and consult a professional before continuing
As experts at the Mayo Clinic emphasize, smooth and controlled movements with straight knees are crucial during weighted calf raises to get the best results and reduce the chance of injury.
If you are recovering from an injury, a gradual progression from assisted to full single leg calf raises, focusing on reaching full height and stretch, is typically recommended for both strength gains and rehabilitation. Using supports such as countertops or rails at first also helps you rebuild stability over time.
Bringing it all together
Weighted calf raises do not need to be complicated. If you:
- Choose a variation that suits your equipment and balance
- Use slow, controlled reps with a full but comfortable range of motion
- Train 2 to 3 times per week and progress the load gradually
you will build stronger, more defined calves that support everything else you do in the gym and in daily life.
Start with one simple change today, maybe adding a single set of dumbbell calf raises at the end of your next workout, and pay attention to how your lower legs feel over the next few weeks. With consistent practice, you will notice the difference every time you walk, climb, or sprint.